wsl2上运行docker run helloworld报错:
Cannot connect to the Docker daemon at unix:///var/run/docker.sock. Is the docker daemon running?
原因是wsl2上没有systemd,需要安装docker for windows
环境:
- wsl2
- Ubuntu-20.04
- windows11 家庭版
Steps
- 如果使用的是wsl1,需要升级到wsl2
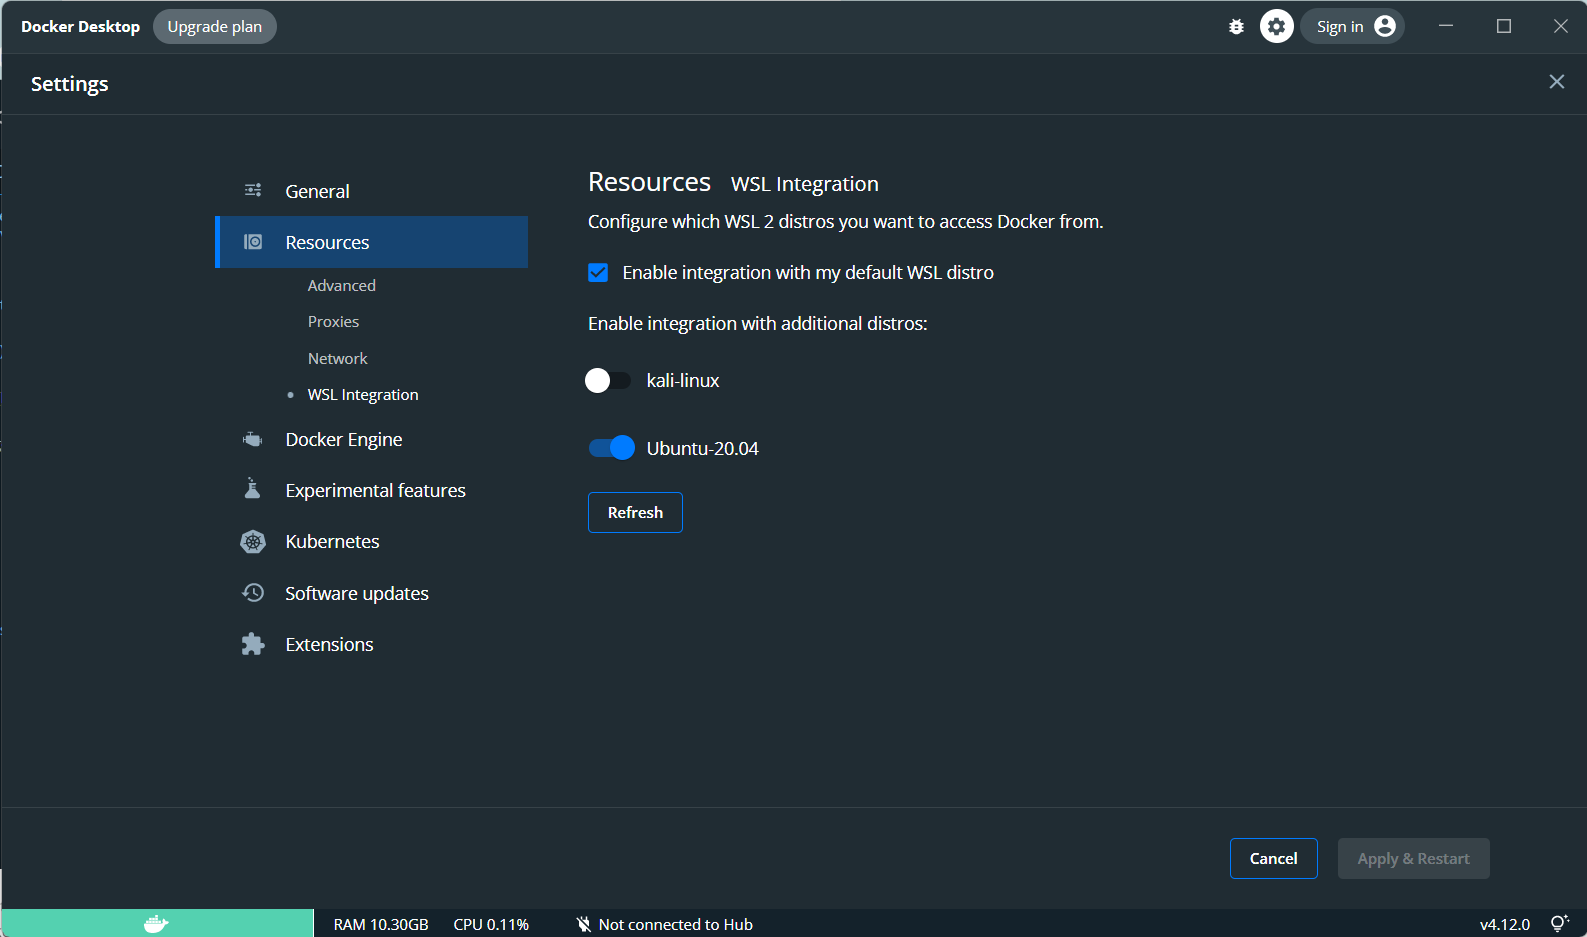
- 安装Docker Desktop for Windows.
- 打开以下设置就OK了
Ref:
- https://stackoverflow.com/a/61640711
- Docker Desktop WSL 2 backend——Docker Documentation
基于wsl2的docker内存占用过大
问题
打开win资源管理器,发现Vmmem占用了大概3GB的内存。
据说,官方内核是可以释放内存的,其他内核不会释放
解决
方法一:修改wslconfig
win终端输入notepad "$env:USERPROFILE/.wslconfig",没有的话就创建这个文件
然后加入以下内容限制wsl2总内存大小
[wsl2]
memory=8GB   # Limits VM memory in WSL 2 up to 3GB
processors=8 # Makes the WSL 2 VM use two virtual processors
swap=8GB
因为担心wsl2使用时内存太少,所以上面设置8GB也起不了作用,因此选择方法二
方法二:重启wsl2(最终采用)
实测直接stop运行的docker实例,并不会减少Vmmem内存。
因此需要重启wsl2,输入wsl --shutdown即可。
同时把Docker Desktop设置中General-Start Docker when you log in取消勾选,这样每次PC启动时就不会运行docker-desktop的虚拟机了。
方法三:手动释放cache内存
echo 3 > /proc/sys/vm/drop_caches,但是docker会显示:
bash: /proc/sys/vm/drop_caches: Read-only file system
看有人解释如下,遂没有采用这方法
You cannot do this from inside the conatiner. The root user in the container is in a different namespace than the actual root, and only the latter has access to /proc.
Ref:
- WSL2 Tips: Limit CPU/Memory When using Docker
- Advanced settings configuration in WSL
- 限制wsl2占用过多内存 - 知乎 (zhihu.com)
其他:win11开启hyper-v
最开始想看Vmmem内存占用过大是哪个虚拟机的问题,发现win11家庭版没有hyper-v管理器。于是开始安装hyper-v,后来发现并不能看到wsl的占用。
安装步骤
创建个txt,输入以下内容,并更改后缀名为bat,使用管理员身份运行。
pushd "%~dp0"
dir /b %SystemRoot%\servicing\Packages\*Hyper-V*.mum >hyper-v.txt
for /f %%i in ('findstr /i . hyper-v.txt 2^>nul') do dism /online /norestart /add-package:"%SystemRoot%\servicing\Packages\%%i"
del hyper-v.txt
Dism /online /enable-feature /featurename:Microsoft-Hyper-V-All /LimitAccess /ALL
之后便可以启用hyper-v manager了。
docker占用C盘空间
参考这里,将 docker-desktop和 docker-desktop-data移动到D盘即可。
远程连接wsl2的docker
首先确保远程连接wsl2
其次在远程wsl2的环境下安装vscode的docker插件
这样就可以在插件里看到所有containers和images